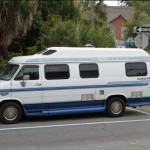
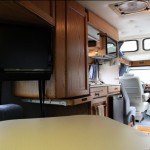
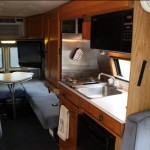
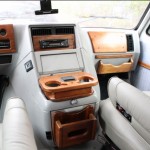
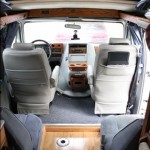
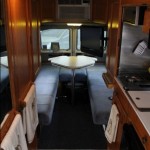
The journey to finding an RV to replace the Cruisemaster is complete. We have in our possession a 1995 Roadtrek 210 Popular. The day we finally got to pick it up from the seller and drive it made me very nervous. I had only seen it in pictures and it looked a little rough in them but perfect to restore without spending much. In one of the images, the duct tape I saw securing the external a/c vents had scared me about what the rest of the vehicle would be like. Unfortunately it was a precursor to the rest of the interior.
There was makeshift everything going on. The a/c had been replaced by one that was not an exact fit and he tried unsuccessfully to fashion moulding to help it blend in. As well as the after-market refrigerator. Same thing, horribly done moulding, and secured using gobs of liquid nails. The carpet was also replaced by him and obviously installed by him as it was not good at all. The best way to describe his style of work is “I fixed it.” Meaning, yes he did fix it, anyway he could, as fast as he could.
Another bad habit he had, or lack thereof, was cleaning. It was a mess. Dust and dirt everywhere. The doors and seats, and anywhere hands touched looked like he had never washed his hands. Counters and cabinets looked like they had never been wiped down in years. This all overwhelmed me at first, but the most important thing at that time was did it drive alright and what condition were the mechanical systems in.
This is where I have to give him credit. His focus was always on the mechanics of the van. It have been meticulously maintained with a stack of records and receipts to prove it. The engine started right up and purred like a kitten. So did the generator which costs as much as an engine does to replace. All the systems were a go, the water pump, the heater, the water heater, the a/c, the inverter, the dash a/c, the coach batteries, etc. I felt much better at that point, as I realized it was all just surface stuff that needed some TLC.
I got in and drove off. It rode great. It handled like a much smaller vehicle. There were a lot of rattles in the back from cabinets and other stuff but I knew I could fix that also. And because rattles while driving make me crazy, they were top on the list.
By just placing felt pads on the insides of all the cabinet doors and drawers, as well as adjusting a few latches made the interior noise-free. And so the renovation began. The next thing I did was buy some 409 and scrub the entire inside of the van from top to bottom. The kitchenette has stainless steel sink, stove and back splashes which were rusty and grimy. By using a little metal polish, thank you Scooter, and elbow grease they returned to sparkling, perfect condition! It was all coming together.
Dismantling was the next phase. He had screws and hooks placed throughout the coach in random places. All would need to go and holes filled in. In many cases the hooks were secured by double sided tape which left a nasty residue. He also had placed black duct tape over things such as switches that didn’t work, gauge that didn’t work which also left a nasty sticky goo behind. The windows had all been covered up with reflective material to keep out the heat, and this too had been secured using duct tape. Even more nastiness to clean up. Luckily there are many products out there to remove this gunk. I chose and it worked great. I am not saying it didn’t go away without some scrubbing and several applications, but it eventually took it all off.
Now the fun stuff began. Installation of the audio/video equipment. We got a new flat screen TV with an SD memory card slot so we do not even need to carry DVDs with us as we can load 50+ movies on one card. And we installed Nora’s DVD screens. She has one mounted on the passenger headrest so she can watch while in the car seat, and it is connected to another monitor in the back. I had to rewire the radio as he had only one speaker working and it was not even mounted in the dash, just held in by 2 pieces of styrofoam he cut to squeeze in the gaps.
The bed supports were broken and I had to replace them. The back couches convert to create a king-sized bed which we bought a memory foam topper for so we did not feel the “seams” created by the cushions below. This made for an extremely comfortable sleeping area.
Now that we had the living basics ready and clean enough to dwell in it was time for the aesthetics. The first thing to go was the horribly cut carpet with fraying edges laid down in the bathroom/kitchen area. I replaced that with a nice piano finish oak laminate flooring thanks to help from my brother-in-law Donny.
The next items to go were the broken and heavily stained front captain’s chairs. I found some awesome electric leather chairs online from a surplus dealer. It proved to be quite a task to get them wired and such but after a few days of looking around for switches and doing some modifications to the pedestals, thanks again Scooter, we got them installed.
I pretty much got everything do\one I wanted to and so we “moved” in. Rachie’s house was pretty full so it was nice to have our own space and free up room in the house for others. We slept very well out there and I had a great work station set up so I could hammer out work for clients.
The time came to head back to Pensacola and find out for real how traveling would be in the Ark. Instead of leaving in the evening and driving through the night we decided to hit the road around noon and take our time driving back. Even hitting the Mote Aquarium in Sarasota and enjoying dinner in Cortez in the back of the van.
We were so comfortable in the van. It rode great. Not a single problem on the journey back. I got us to Pensacola just before 3 a.m. Enough time left to get some good sleep and start working.
Over the next few days I worked on finishing up what I had started. One thing I had been wanting to do is get the spare tire out from the storage under the rear bench seat to free up valuable storage space. To do that I need to get a spare tire mount that attached to the rear door but after pricing new ones at around $300 -$400 including the chrome cover and cap I was somewhat dejected. That was way out of budget. Then I got an idea to check the local junk yards to see if a salvaged van perhaps still had a decent one.
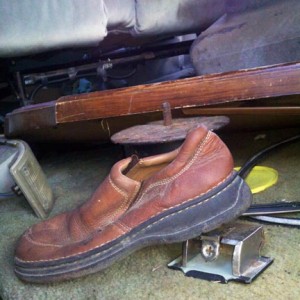
Who would have thought a junk yard would be a gold mine for Lost Soles. I found 8 without even searching. This one, #406 was the first I found and it was in the van from which I salvaged all of the wooden dashboard trim from.
So there you have it. A formal introduction to Nora’s Ark. We have been making regular jaunts with it to the beach and for lunch outings. It is much easier to order take out and park the van at a park and eat inside so Nora has her space and we can eat without chasing her around. The Ark will sure see plenty of use and many adventures. The next one being a trip up to Cincinnati and over to Baltimore with numerous stops in between.

